What to Organize When Stuck At Home - Part 2

It’s only been two weeks of “sheltering-at-home”, and our world is functioning completely differently. I have been riding a roller coaster of emotions. My motivation waxes and wanes. Luckily, my kids are in spring break this week, so I do not have the added pressure of making sure they are keeping up with their studies. Let’s see what next week brings. I have also discovered that I am wildly extroverted. I need to interact with people to keep my spirits up. Planning out this article and related social media posts has proven to be a nice distraction. My hope is that these activities will help you maintain a bit of normalcy and feel like you have achieved something. Little things add up to make a big difference. What I wrote in part 1 still holds true: Do what you can, when you can. By the end of our time at home, you will have less clutter and more room to breathe.
Project 8: Update Your To Do List

Boost your productivity by organizing your To Do list by location of where your task needs to take place.
I don’t know about you, but I am starting to get a sense of what I can reasonably accomplish in a day and a week. With another week ahead of us, now is a great time to revisit the To-Do List. Make a list of all of your projects and tasks. Depending on how last week went, choose 2 to 5 to get done each day. Be realistic. A certain level of anxiety is omnipresent at this point, so make sure to include tasks that will help you relax. “Read the newspaper on the porch” is on my list, as is “call a friend.”
Project 9: Make a Paper Pile Disappear
Some of us have a pile here and there, while others have many piles. Since these projects are designed to be done quickly, I want you to start with just one pile. If you have the time and energy when you are done with that one, feel free to move on. Otherwise, just one is perfect for today.
Here is what to do: grab a pile of paper and your To-Do list. Sort the stack into four piles: to-do, to pay, to file, to recycle. Once sorted, take the recycle pile to your recycle bin, pay those bills, and add to-do items to you list (including file papers.)
Not sure what to file and what to toss? These guidelines for paper retention will help. (hint: you need to keep much less than you think.)
Bonus tip: the app PaperKarma will help you significantly eliminate junk mail. I have been using the app for over a year and the amount of mail I receive each day has dwindled.
Project 10: Phone Photos

We have all marveled at the amount of images on our phones, and also wondered when we are going to have some time to go through them. Now is that time! Let’s relive all of those wonderful memories, and free up a significant amount of space.
Start with your oldest images. As you scroll through them, channel your inner curator or fashionista by keeping only the best. Be very discerning. Delete duplicates, fuzzy images, anything that is less than perfect. Set a timer for at least 30 minutes. Enjoy.
Project 11: Pantry
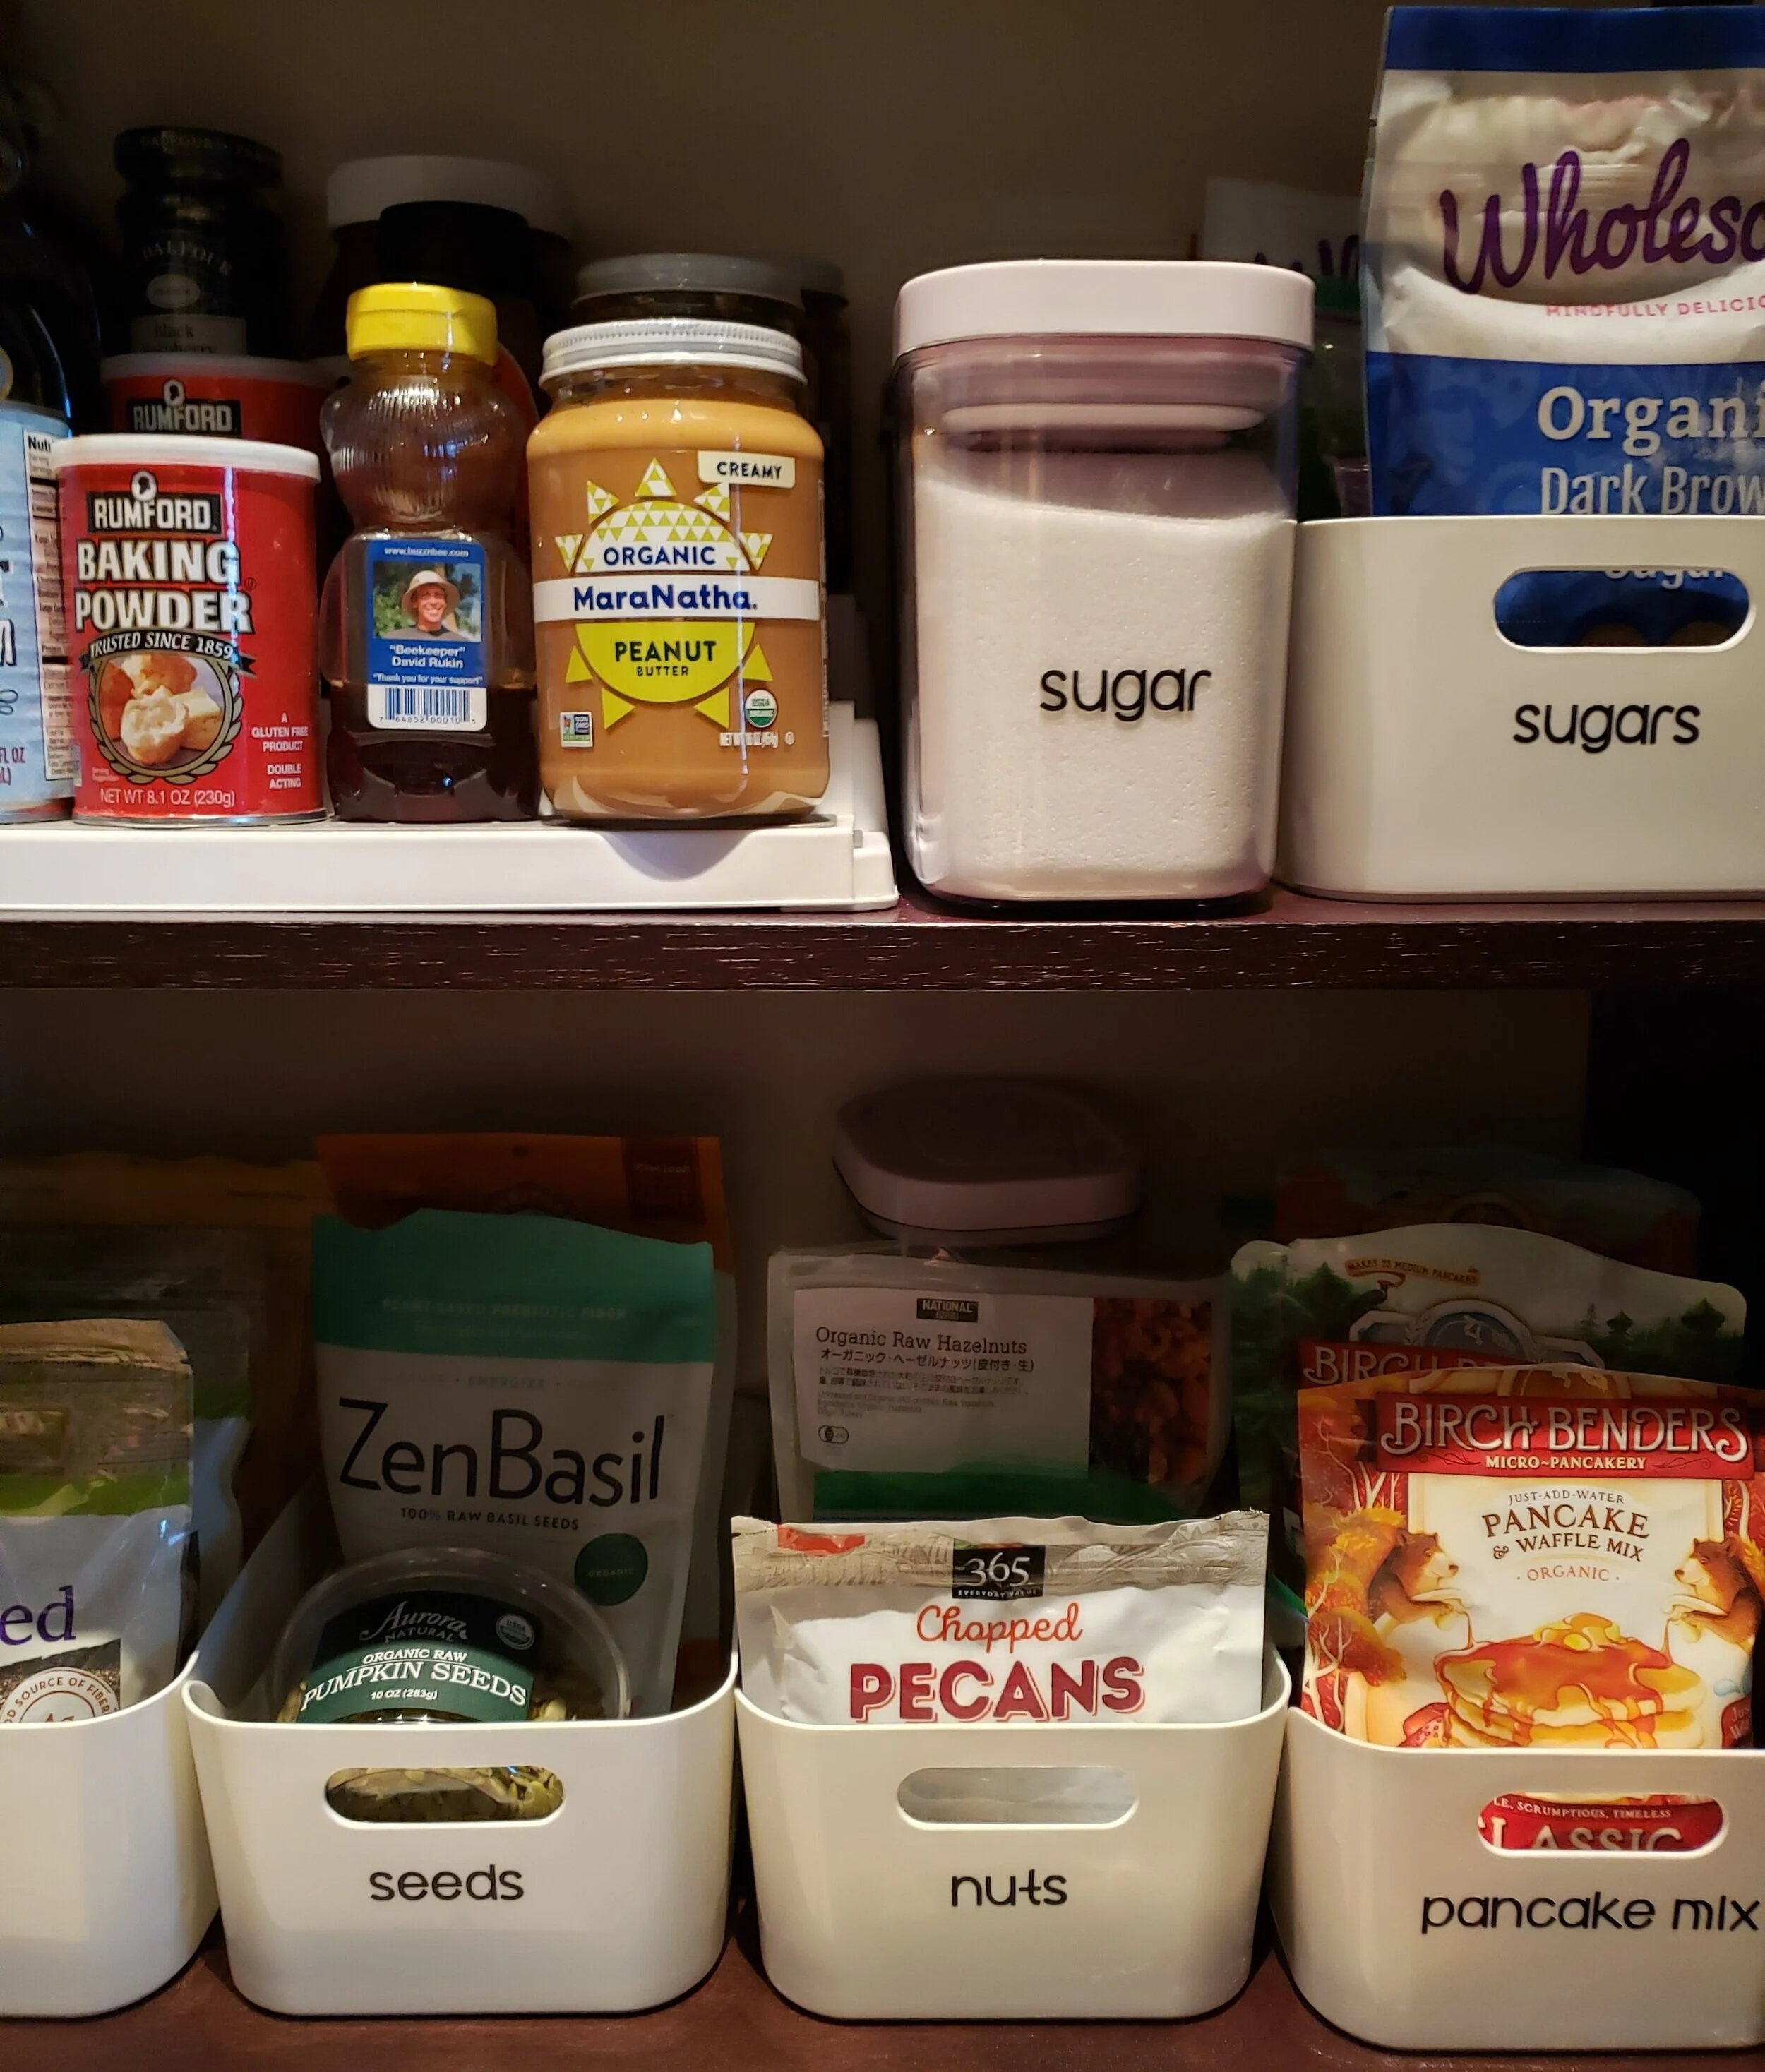
Now more than ever space in the pantry is at a premium. As with the Tupperware project, a great way to find space is to eliminate items that you cannot use. Grab a garbage can, pick a shelf, and start pulling things out. Check labels for expiration dates and toss accordingly. Once the shelf is clear, wipe it down, and put the keepers back. I always keep labels facing outward so I can see what I have at a glance. Keep going, shelf-by-shelf, as time allows.
You’ll note that throughout these project there is not a large focus on acquiring products, more on habits and time management. In the pantry, in particular, however, the right organizing product can make all the difference. If your pantry is very deep, a tiered riser or a lazy susan can be used to help access cans and jars. Labeled bins can be used to corral items on wide shelves.
Project 12: Gift Cards
Speaking of shopping for supplies, now would be a terrific time to use those gift cards that you might still have lying around from birthdays and holidays past. Treat yourself AND do your part to support the economy. Gather all of your cards. Turn on your computer. Have fun.
Project 13: Kids Artwork

Now is a great time to tame that pile of artwork your child has produced. Many parents struggle with this category. Yes, you can foster your child’s creativity while also keeping your home clutter-free. The secret lies in being selective. I am, officially, giving you permission to “edit” the collection. Remember, when everything is special, nothing is special.
It is easiest to start with the oldest items. With the passage of time, certain artworks will no longer seem as important as they once did and letting them go to make space for other things will make more sense. Keep in mind that even if you just hold on to 10 pieces per school year, you’ll need to store 150+ pieces of artwork per kid.
Milestone pieces, like the first time your child draws a self-portrait or a picture of your family are keepers. Scribbles in a coloring book? Those can go in the recycle bin. Keep the pieces that reflect the best example (singular) of your child’s talent, creativity, and personality at that point in time. If you prefer to create a digital portfolio, the options are plentiful. One of our favorites include Artkive.
Project 14: Clothes

Organizing an entire master closet can take 4 to 8 hours. If you have time for that, great. (We’ve written some fantastic articles about closet organizing that can guide you.) This series is about short, easy organizing projects. The best way to break down your master closet organizing project is to focus on one clothing type or accessory at a time. I recommend starting with the type that you are least attached to.
Pull each item out. Sort by color and style. Select your favorites. Try things on. Be ruthless. You deserve to look great in everything you own. Chances are if you have not chosen to wear a pair of pants all winter, you are not going to want to wear them next winter, either. Set aside to donate anything that is not flattering, that you no longer like, or is out of date. Toss anything stained, stretched out, or broken. Put the keepers back in the drawer or closet. Repeat the next day with another clothing type.
Time to celebrate that you have gotten this far! If there are any other areas you are having trouble tackling let us know. We’d love to help.